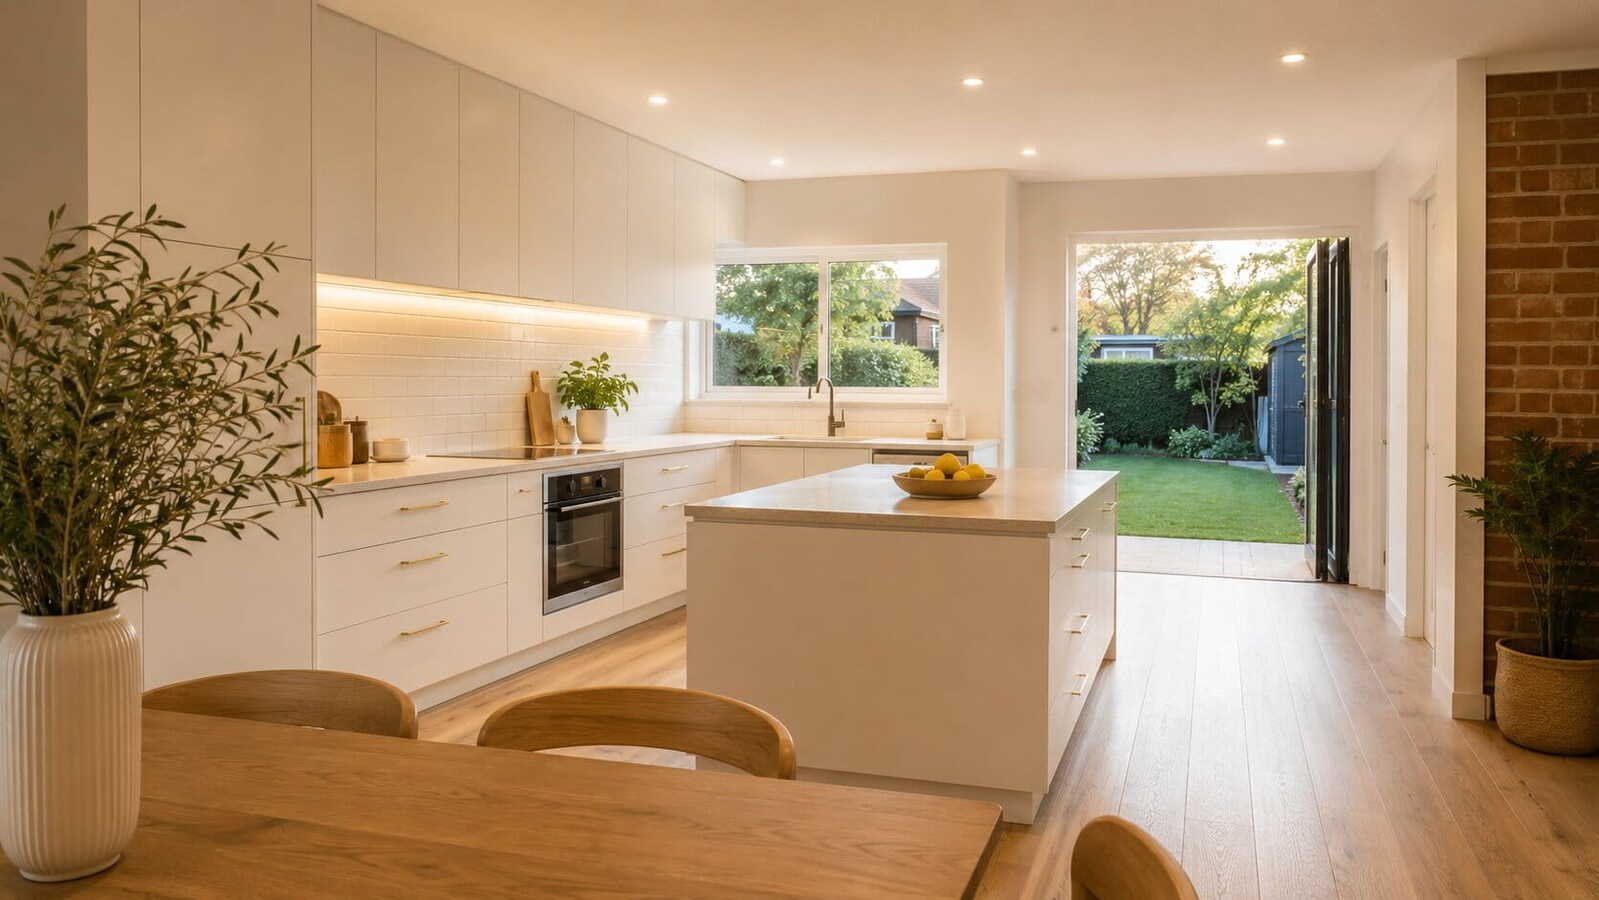
Silk Touch Joinery is a Melbourne-based bespoke joinery workshop that designs and fabricates custom kitchen, wardrobe, and whole-home joinery for residential properties across Melbourne’s east, including Nunawading and surrounding Whitehorse City Council suburbs. A post-war kitchen renovation in Nunawading in 2026 requires specific knowledge of 1950s–1970s brick veneer construction — low ceiling heights, frequent load-bearing internal brick walls, and galley or closed L-shape kitchen layouts that predate the open-plan era.
Six weeks after signing the quote, the kitchen arrived. New doors, new handles, a new benchtop — everything the homeowner had chosen, installed exactly as specified. And standing in it on the first morning, the feeling was immediate: it was exactly as cramped as the original.
That feeling has a cause, and it is not the doors or the handles or the benchtop. It’s the ceiling.
The overhead cabinets on this kitchen are 720mm high, with the bottom of the cabinet sitting at 1,550mm above the finished floor. Between the bench surface at 900mm and the underside of that overhead cabinet is 650mm of visual and functional space — the bench-to-overhead zone that every person working in that kitchen looks at all day. In the kitchen showroom, with 3.0m ceilings, that cabinet looked proportionate. The consultant showed it on a screen render and it looked like a kitchen should look.
In a Nunawading 2.4m ceiling, the same specification produces a different result. The overhead cabinet doesn’t float in the middle of the wall. It starts at 1,550mm and runs to 2,270mm — leaving 130mm between the top of the cabinet and the ceiling. That gap is the problem. It is not enough to be functional, and it is too much to be invisible. It reads as a dark horizontal band of unresolved space running the full length of the kitchen. Combined with the low ceiling above it, the room compresses. Different doors, same ceiling, same sense of enclosure the homeowner was trying to leave behind.
Post-war homes require post-war-specific decisions. The cabinet heights, the overhead depth, the profile choice, the ceiling termination detail — these are not aesthetic preferences in a 2.4m kitchen. They are functional decisions that determine whether the renovation succeeds or fails. This guide covers all of them.
The open-plan conversion structural context — structural engineer assessment, building permits, load-bearing wall identification — is covered in depth in the kitchen renovation Blackburn guide, which applies directly to Nunawading’s identical brick veneer construction. The outdoor connection opportunity relevant to Nunawading’s garden-oriented blocks is covered in the kitchen renovation Vermont post. This post focuses on what is specific to Nunawading — particularly the 2.4m ceiling height that is the suburb’s defining renovation challenge.
Understanding Nunawading’s Post-War Housing — The Four Challenges
Walk through any of Nunawading’s residential streets and you will notice something unusual for Melbourne’s inner-middle east: the housing stock is remarkably cohesive. There are no Edwardian terraces from the 1890s, no interwar bungalows from the 1930s, no 1970s split-levels sitting beside Federation cottages. Nunawading is almost entirely post-war — the suburb was developed from the late 1940s through the 1970s, and that is what is there today. Compact, single-storey homes on 500–650 sqm blocks, weatherboard and brick veneer construction, and kitchens that have not fundamentally changed since the 1990s.
That housing cohesion creates a specific renovation challenge profile. Nunawading’s post-war homes are not all identical — a 1955 weatherboard in Nunawading East is a different structure from a 1972 brick veneer on Springvale Road — but they share four challenges that come up in nearly every kitchen renovation brief we have worked through in this suburb.
Challenge 1 — The 2.4m Ceiling Height
Nunawading’s original 1950s–1960s homes were built with ceiling heights of 2.4m in most living and kitchen zones — 150–300mm lower than the 2.55–2.7m standard in Whitehorse’s 1980s–1990s homes built in the same suburb. Unlike the later suburban development further along the Whitehorse corridor — including the housing stock covered in detail in the kitchen renovation Mitcham guide, where 1970s–1990s homes commonly have noticeably more ceiling clearance — Nunawading’s original 1950s housing is almost exclusively at 2.4m. In kitchen design, that difference of 150–300mm is significant. It changes the correct overhead cabinet height, the appropriate profile, the position of the bench-to-overhead visual transition, and the lighting specification. A kitchen designed for a 2.7m ceiling, installed into a 2.4m kitchen, looks wrong — not because the design is bad, but because none of the ceiling-specific decisions were made correctly. The majority of this post is about that one number.
Challenge 2 — Load-Bearing Brick Internal Walls
Nunawading’s 1950s–1960s brick veneer homes commonly have internal brick walls — not plasterboard partitions, but actual masonry — between the original kitchen and the adjacent living or dining zone. These walls are frequently load-bearing. The open-plan conversion that defines Nunawading’s current renovation wave — removing the wall between the kitchen and the living zone to create a single connected space — cannot proceed safely without a structural engineer’s written assessment confirming the wall’s status and specifying any beam required. This is not an optional step. It is the precondition for a building permit from Whitehorse City Council, and it is the precondition for a renovation that does not compromise the structural integrity of the home.
Challenge 3 — The Closed Galley Layout
The original Nunawading kitchen is a closed galley or compact L-shape — designed for a domestic culture in which the person cooking was not expected to be part of the household’s social life. The kitchen faced the back fence, the window was small, and the entry from the hallway was the only connection to the rest of the house. In 2026, this layout is the renovation problem. The solution is understood — wall removal, open-plan conversion — but the execution must account for the ceiling height, the structural reality, and the specific room proportions that Nunawading’s 1950s footprints produce. Those proportions are smaller than you might expect: a typical original kitchen in a 1955 Nunawading home is approximately 3.0m × 3.5m. That is not much to work with once the wall comes out and the kitchen needs to function as the centrepiece of a contemporary open-plan living space.
Challenge 4 — Subfloor and Floor Level Continuity
In Nunawading’s slab-on-ground 1950s homes, the floor level at the junction between the original kitchen and the adjacent zone can vary — particularly where a rear lean-to was added in the 1980s or 1990s at a slightly different slab level to the original structure. In a renovation that removes the boundary between the original zone and the 1980s addition, the slab level differential can become a visible floor irregularity: a step, a gradual ramp, or a floor plane that varies by 20–50mm across the kitchen zone. Achieving a flush floor transition — less than 10mm level variation — from the kitchen through to the living zone and out to the rear garden requires early coordination between the builder addressing the slab and the joiner setting cabinet toe kickboard heights section by section. Identifying this condition at the planning stage prevents a costly rework after installation.
Doing Ceiling Height Right — The Most Important Design Decision in a Nunawading Kitchen
This is the section that matters most for Nunawading. Other suburbs in Melbourne’s east share the load-bearing wall challenge and the closed-layout problem. Nunawading’s 2.4m ceiling height is its own defining constraint, and it is the one most frequently handled incorrectly. Here is exactly what done right looks like.
The Cabinet Height Calculation for a 2.4m Kitchen
In a standard contemporary kitchen designed for a 2.7m ceiling, the installation heights typically look like this:
- Bench surface height: 900mm
- Bottom of overhead cabinet: 1,500–1,550mm above the finished floor (600–650mm bench-to-overhead clearance)
- Top of overhead cabinet: 2,220–2,270mm above the finished floor
- Soffit — the gap between the top of the overhead cabinet and the ceiling: 130–180mm, often infilled with a bulkhead or left open
In a 2.4m ceiling kitchen, applying these same heights produces a specific problem. The top of the overhead cabinet sits at 2,270mm above the finished floor. The ceiling is at 2,400mm. The gap between them is 130mm — too small to build a functional bulkhead, and too prominent to leave open and unresolved. The dark horizontal strip above the overhead cabinet for the full length of the kitchen is one of the most recognisable signs that a 2.4m kitchen was designed using specifications calibrated for a different ceiling height entirely. It is the gap that homeowners notice immediately after installation and cannot stop noticing afterward.
The standard workarounds each introduce a different problem. Reducing the overhead cabinet height to create more soffit space reduces storage and distorts proportions. Raising the overhead cabinet to close the gap tightens the bench-to-overhead clearance below the 600mm functional minimum, which creates a different compression problem in the working zone of the kitchen.
The Silk Touch Joinery approach for Nunawading’s 2.4m kitchens eliminates the soffit gap entirely. Run the overhead cabinet from approximately 1,500mm above the finished floor directly to the ceiling — a cabinet height of approximately 900mm, terminating cleanly at the ceiling line. This requires a precision scribe at the ceiling (which is rarely perfectly flat in a 1950s plasterboard ceiling, so scribing tolerance matters more than in a new build) and a clean ceiling termination detail: a shadow gap or recessed aluminium channel rather than a traditional cornice, which would sit below the ceiling line and reintroduce a visible gap that the ceiling-height run is designed to eliminate. The result: the overhead cabinet disappears into the ceiling. The eye reads the room as taller, not shorter, because there is no dark horizontal band above the cabinetry, no visible compression line at the top of the kitchen, and no unresolved space demanding attention. This is consistently the highest-impact single decision in a Nunawading kitchen renovation.
The Overhead Cabinet Profile for a 2.4m Kitchen
Profile choice is an aesthetic decision in a 2.7m kitchen. In a 2.4m kitchen running overhead cabinets floor-to-ceiling, it becomes a functional one.
A wide-rail Shaker profile — 60–70mm top and bottom rail, 45mm stile — is warm and appropriate in a period-inspired kitchen at standard ceiling height. Running that same profile floor-to-ceiling at 2.4m, the visual weight of the rail immediately below the shadow gap reads as heavy and disproportionate. The proportions that work at 2.7m do not translate. The profiles that perform correctly in Nunawading’s 2.4m kitchens are:
Flat-slab with integrated handle channel (J-pull): The flattest possible door face, with no raised rail or stile. The J-pull channel is routed horizontally into the bottom of the door — no separate handle hardware. This is the lowest-visual-weight option for a low-ceiling kitchen and the one that creates the strongest perception of ceiling height. In a warm white 2-pack finish, it reads as clean, contemporary, and spatially generous.
Slim-Shaker (narrow rail and stile, 35–40mm maximum): The most restrained version of the Shaker profile. At this rail width, the Shaker character remains readable — the four-sided frame, the central flat panel, the period warmth — but the visual mass is significantly reduced compared to a standard Shaker specification. Acceptable at 2.4m, particularly in a warm white finish that softens the edge definition further and prevents the profile from dominating the ceiling-height door run.
What to avoid: a wide-rail Shaker profile, a beaded profile, any profile with significant visual mass at the rail or stile. In a 2.4m floor-to-ceiling overhead cabinet run, a heavy profile is the visual equivalent of lowering the ceiling by another 50mm. The profile decision and the ceiling termination detail work together — get both right and the kitchen reads as taller than it is; get either wrong and the ceiling height becomes the story.
The Bench-to-Overhead Clearance in a 2.4m Kitchen
At 2.4m ceiling height, with the overhead cabinet running floor-to-ceiling at a 900mm cabinet height starting at 1,500mm above the finished floor, the bench-to-overhead clearance is 600mm. This is the minimum functional clearance for a working kitchen — sufficient for a person of standard height to work at the bench without overhead obstruction, but not generous. There is no room in that 600mm zone for a wall-mounted microwave, toaster, or coffee machine. These appliances typically project 250–350mm below the overhead cabinet base, leaving only 250–350mm of clear bench surface beneath — well below the functional minimum for practical bench use in that zone.
The correct response for small-appliance storage in a Nunawading low-ceiling kitchen is an appliance garage: a section of overhead cabinet fitted with a Tambour roller shutter that allows an appliance to be used in situ on the bench, then concealed behind a closed shutter when not in use. The appliance sits in the bench zone — not suspended from the overhead cabinet base — and the shutter maintains a visually clear bench when closed. This is a joinery specification decision, not a retrofit: it is designed into the overhead cabinet layout at the drawing stage and built as part of the cabinetry.
Blum Clip Top Blumotion hinges open to 170° — meaning overhead cabinet doors in a 2.4m kitchen lie flat against the adjacent cabinet face rather than projecting into the narrow clearance zone between bench surface and overhead cabinet base. At 600mm clearance, a door projecting at 90° sits at chest height for a person working at the bench. The 170° opening eliminates that obstruction entirely and is the standard specification for all overhead cabinet hinges in Silk Touch Joinery’s Nunawading kitchens.
LED Lighting in a Low-Ceiling Kitchen
Low-ceiling kitchens are systematically under-lit when specified to a standard ceiling downlight schedule. In a 2.7m kitchen, a downlight in the ceiling distributes light broadly across the bench surface and creates a comfortable ambient field. In a 2.4m kitchen, the same downlight is 300mm closer to eye level — it can be in the direct line of sight of a person standing at the bench, creating glare rather than task illumination. And because the ceiling plane is lower, there is less reflected ambient fill from the ceiling surface. The combination produces a kitchen that feels darker than its dimensions should allow.
The solution is warm-white LED strip lighting, correctly specified and positioned, under every section of overhead cabinet. The strip sits at the front of the cabinet base, angled downward at approximately 30°, directed at the bench surface directly below. Warm white LED — 2,700K, CRI 90+ — under every overhead section, not just above the primary bench run but above the return run and above any appliance garage section. Motion sensor or dimmer circuit. This must be in the electrical rough-in brief, not added as a retrofit after the cabinetry is installed: the wiring chase behind the cabinet base, the switch position, and the circuit are all determined at the rough-in stage before the joinery arrives on site.
The practical outcome: a well-lit Nunawading 2.4m kitchen with LED strip under every overhead section is brighter at bench level than a 2.7m kitchen with ceiling downlights only and no under-cabinet lighting. The ceiling height constraint, handled correctly in the electrical specification, produces no deficit in functional illumination. It produces a warmer, more directed light quality than ceiling-only lighting at any ceiling height.
The Open-Plan Conversion in Nunawading — Getting the Structural Phase Right
The detailed structural framework for open-plan conversions in Melbourne’s east — how to identify a load-bearing wall, what the structural engineer assessment involves, how the building permit process works — is covered in depth in the kitchen renovation Blackburn guide. Nunawading’s brick veneer construction is effectively identical to Blackburn’s at the same period, and the structural process applies directly. What follows is the Nunawading-specific context.
The Brick Wall Reality in Nunawading
Nunawading’s internal brick walls are more likely to be load-bearing than the internal timber-frame walls of later suburban homes in the same area. The reason is historical: 1950s brick veneer construction used brick more frequently for internal walls than the plasterboard-on-timber-stud-frame construction that became standard from the mid-1960s onward. A wall between the original kitchen and the living zone in a 1955 Nunawading brick veneer is more likely to be masonry — and therefore potentially load-bearing — than an equivalent internal wall in a mid-1980s property in the same street. Never assume a Nunawading internal wall is non-structural without a written structural engineer’s confirmation.
A practical first indicator: knock on the wall. A hollow sound suggests timber-frame plasterboard. A solid, dense thud suggests masonry. This is not a substitute for a structural assessment, but it tells you which conversation to prioritise with the structural engineer first, and it helps set realistic expectations about cost and timeline before the assessment is booked.
The Specific Structural Requirement
Whitehorse City Council requires a structural engineer’s assessment before issuing a building permit for any load-bearing wall removal. Whitehorse City Council standard building permit processing times for residential structural works are typically 3–6 weeks in 2026 — among the faster outer-eastern council processing timelines in metropolitan Melbourne. A structural engineer’s assessment for a Nunawading residential wall costs $500–$1,200. If the wall is confirmed as load-bearing, the engineer specifies the steel or LVL beam required to replace the wall’s structural function — typically resulting in $7,500–$16,000 in builder’s works for a standard residential opening.
The joinery layout is designed after the beam position and resulting clear opening width are confirmed, not before. This sequence matters more than it may initially appear. Some Nunawading homeowners book a joiner and a builder simultaneously, expecting to run the design and structural phases in parallel. In practice, the structural engineer’s beam specification determines the available opening width, which determines the island dimensions and the total kitchen run, which determines the joinery design and cost. Designing the kitchen before the beam is specified — and then discovering that the confirmed opening is 200–300mm narrower than the design assumed — means redesigning the joinery layout at cost and time. The correct sequence is: structural engineer assessment, then building permit, then site measure, then joinery design.
The Nunawading-Specific Floor Transition Issue
Many Nunawading homes received a rear lean-to kitchen or laundry addition in the 1980s — a modest addition that increased floor area but was not necessarily built to the same slab level as the original 1950s structure. In a renovation that removes the boundary between the original zone and the 1980s addition, the slab level differential may become a visible floor irregularity: a step, a gradual ramp, or a floor plane that varies by 20–50mm across what is now intended to be a single continuous kitchen zone. Achieving a flush floor transition — less than 10mm level variation from the kitchen through to the living zone and out to the rear garden — requires slab grinding or levelling works before installation, and a section-by-section cabinet toe kickboard height adjustment where the floor cannot be perfectly levelled.
This is one of the primary reasons Silk Touch Joinery’s site measure for Nunawading open-plan conversions occurs after structural works are complete, not before. If you are engaging a kitchen joiner in Nunawading and they want to complete their full measurement before structural works are done, ask specifically how they handle slab level differentials across the combined zone. The answer is informative about the rigour of the process that follows.
Layout Options for Nunawading’s Post-War Kitchens
Nunawading kitchen renovations in 2026 fall into three layout categories, each with a distinct cost range and structural implication. The correct choice depends on the household’s functional brief, the kitchen’s existing footprint, and the tolerance for structural works and timeline.
The In-Place Galley or L-Shape Renovation
For Nunawading homeowners whose kitchen footprint is being retained — a full joinery replacement within the existing kitchen zone, no wall removal, no structural works required. The original 3.0m × 3.5m or 3.5m × 4.0m kitchen is re-fitted with entirely new cabinetry, benchtop, splashback, and appliances. All of the 2.4m ceiling height decisions covered in this post apply in full — ceiling-height overhead run, correct profile, LED strip lighting under every overhead section — and produce a dramatically better-functioning and better-looking kitchen than the original, despite no change to the room’s footprint or overall dimensions.
The in-place renovation is the most direct path for Nunawading homeowners who want a significantly improved kitchen without the complexity and timeline of a structural works phase. It is also the correct choice when the original kitchen zone is adequate for the household’s actual functional brief — when the problem is the joinery, the finishes, and the lighting, not the room size itself. Joinery supply: $8,000–$12,000 for a compact galley under 4m; $12,000–$20,000 for a standard L-shape or single-wall kitchen of 4–7m. No structural engineer, no building permit, and no builder’s preliminaries are required for a like-for-like joinery replacement within the existing footprint.
The Wall Removal Open-Plan Conversion
The dominant Nunawading renovation outcome in 2026. The wall between the closed kitchen and the adjacent living or dining zone is removed — following structural assessment and building permit issuance — and the resulting combined zone is designed as an integrated open-plan kitchen and living space. The combined zone in a single-storey 1955 Nunawading home is typically 4.5m × 5.0m to 5.0m × 6.0m after wall removal — enough for an L-shaped kitchen with a functional island and a dining area, provided the island is sized correctly for the ceiling height.
At 2.4m ceiling height, the island design requires specific restraint. The island bench should be bench-height only — 900mm to the benchtop surface — with no upper tier, no overhead structure, and no pendant lights suspended from a feature beam or overhead architectural element. The ceiling is at 2.4m. Any vertical structure above bench height in a room at this ceiling height adds visual compression immediately and is difficult to resolve with lighting or palette choices alone. The island reads better as a clean, horizontal element. The typical island dimension for a post-wall-removal Nunawading kitchen is approximately 1,400mm × 900mm — functional on both sides for preparation and casual dining, and proportionate to the ceiling height of the space.
Joinery supply: $18,000–$30,000+ for a 7m+ total run with island. Builder’s structural works for a load-bearing wall with beam: $7,500–$16,000. Add structural engineer assessment, building permit, floor levelling works, and all-trades finishes as itemised in the cost guide below.
The family storage approach for open-plan Whitehorse homes — drawer configurations, larder cabinetry, and integrated appliance housing for households with children — is covered in detail in the kitchen renovation Forest Hill guide, which addresses the same Whitehorse Council housing stock from a family-first editorial angle and applies directly to Nunawading’s equivalent brief.
The Minor Rear Extension
For Nunawading homeowners who want more floor area than the in-place renovation can deliver, and who want to resolve the 2.4m ceiling height constraint permanently rather than designing around it. A 2.5–3.5m single-storey rear extension creates a purpose-designed kitchen zone — built new, at whatever ceiling height the kitchen requires rather than the ceiling height it inherits. A new single-storey addition at the rear of a Nunawading 1950s home can be designed at 2.7m or higher ceiling height, resolving the overhead cabinet dimension question entirely, while connecting through a structural opening to the original zone — which retains its 2.4m ceiling and transitions naturally to a dining or secondary living area. The ceiling height differential at the junction is handled as an intentional architectural feature.
Builder’s works for a minor rear extension across Melbourne’s inner-east currently range from $45,000–$90,000, depending on the extent and specification of the addition. Joinery supply for the new kitchen zone: $18,000–$30,000+. This is the most significant investment category in the Nunawading renovation landscape, and the correct choice only when the household’s functional brief genuinely requires floor area that the original structure cannot provide — not simply as a response to the ceiling height challenge, which can be resolved correctly within the original footprint.
2026 Material Palettes for Nunawading Kitchens
In a 2.4m kitchen, material choices have a measurable effect on how the room feels to live and work in. Light reflects. Dark absorbs. Reflective surfaces open a room. Matte surfaces quieten it. At Nunawading’s ceiling height, these effects are amplified — the palette is not purely an aesthetic decision, it is a spatial one. Three palettes consistently perform well in Nunawading’s post-war housing context and the 2.4m ceiling constraint it presents.
The Light and Airy (Most Recommended for Low Ceilings)
Warm white 2-pack, flat-slab or Slim-Shaker profile throughout. Engineered stone benchtop in warm white or very pale grey-white — Caesarstone Alpine White or a comparable tone that reads cleanly white in natural light and returns light rather than absorbing it. Brushed nickel bar handles: cooler and lighter in visual weight than aged brass, appropriate for the all-white palette and the 2.4m ceiling context. Simple white ceramic subway tile splashback in a straight lay — clean, period-appropriate, and reflective. Warm engineered timber floor to introduce grain and natural warmth at ground level without adding colour at the ceiling-height run where it would compress the room.
This palette maximises the perception of ceiling height in a Nunawading 2.4m kitchen. Every surface above the floor level is as light and reflective as possible. Warm white at 2.4m consistently reads taller than any warmer or darker tone because it bounces rather than absorbs available light — particularly important in Nunawading’s west and south-facing kitchens that receive limited direct natural light through the working hours of the day. For any Nunawading homeowner uncertain about palette direction, this is the correct starting point.
The Warm Greige Contemporary
Warm greige 2-pack Slim-Shaker profile — a step warmer than white without introducing darkness into the ceiling-height overhead run. Engineered stone benchtop in warm grey-white. Aged brass bar handles — the warmth of the metal reads well against the greige and prevents the palette from reading too cool. Simple handmade ceramic tile splashback in an off-white glaze — slight surface variation adds warmth without adding colour. American Oak open floating shelves on one section of the overhead cabinet run, keeping the timber element to a single visible shelf rather than a full overhead cabinet or full island base, both of which would darken the room at heights where that darkness is most damaging to the perception of ceiling height.
This palette performs best in Nunawading’s north and east-facing kitchens, which receive warm morning light that interacts well with the greige undertone and the American Oak shelf grain. In a south-facing kitchen, the greige can read cooler and heavier than the showroom sample suggested; the warm white palette above is a more reliable choice for those orientations. Discussing orientation in the initial consultation allows the palette recommendation to be calibrated to the specific property rather than the general preference.
The Two-Tone (Use with Caution in Low-Ceiling Kitchens)
If a two-tone palette is the brief — dark lower cabinets, light upper cabinets — the darker tone must be reserved exclusively for the base cabinets in a Nunawading 2.4m kitchen. Dark overhead cabinets at 2.4m ceiling height compress the room immediately and significantly. A dark overhead cabinet run at 2.4m makes the kitchen feel like a corridor regardless of how well the rest of the finishes are executed — it is a spatial problem that lighting and bench materials cannot correct.
The two-tone configuration is more successful in Nunawading’s 1970s homes, which were commonly built at 2.55m ceiling heights and which sit in a different territory spatially. If the kitchen at issue is a 1970s brick veneer on Whitehorse Road, Mitcham Road, or Canterbury Road, a two-tone palette with a deep forest green, navy, or charcoal base is viable and can look very well resolved. In a 1955 home at true 2.4m, use caution and discuss the ceiling height implications thoroughly before committing to any dark tone above bench height.
The design philosophy that underpins Silk Touch’s kitchen joinery approach across Melbourne’s inner and middle east — including period-appropriate palette decisions for lower-ceiling homes and how the material decisions change across different building periods — is covered in detail on the kitchen renovation Hawthorn pillar page.
For the parallel palette context in Nunawading’s immediately adjacent housing stock — specifically how material choices interact with the specific brick veneer character of the Mitcham corridor — the kitchen renovation Mitcham guide covers that comparison in useful detail.
2026 Cost Guide — Kitchen Renovation in Nunawading
The following figures are Silk Touch Joinery’s confirmed 2026 pricing for joinery supply in Nunawading. All joinery pricing is supply-only and excludes installation, stone, appliances, and trade works unless stated. Builder’s works, structural, and trade ranges are indicative based on current market rates across Melbourne’s inner-east in 2026.
Joinery Supply Only
| Kitchen scope | Supply-only range (AUD) |
|---|---|
| Compact in-place renovation (under 4m total run) | $8,000 – $12,000 |
| Standard L-shape or single-wall (4–7m total run) | $12,000 – $20,000 |
| Open-plan kitchen with island (7m+ total run) | $18,000 – $30,000+ |
| Whole-home package (kitchen + laundry + wardrobes) | $30,000 – $70,000+ |
Structural and Builder’s Works (Not Joinery)
| Item | Estimated range (AUD) |
|---|---|
| Structural engineer’s assessment | $500 – $1,200 |
| Building permit (Whitehorse City Council, 3–6 weeks processing) | $800 – $2,000 |
| Internal brick wall removal + beam | $7,500 – $16,000 |
| Timber-frame partition wall removal | $2,000 – $5,000 |
| Rear single-storey extension (2.5–3.5m depth) | $45,000 – $90,000 |
| Floor level correction (slab grinding/levelling at junction) | $800 – $3,000 |
All-Trades Kitchen Add-Ons
| Trade / item | Budget range (AUD) |
|---|---|
| Stone benchtop | $2,500 – $10,000 |
| Appliances | $4,000 – $20,000 |
| Splashback | $800 – $2,500 |
| Plumbing | $1,000 – $3,500 |
| Electrical (including LED under-cabinet strip — quote separately) | $1,000 – $3,000 |
| Painting | $1,000 – $4,500 |
| Flooring | $3,000 – $9,000 |
Frequently Asked Questions
How much does a kitchen renovation cost in Nunawading in 2026?
Bespoke kitchen joinery in Nunawading starts at $8,000–$12,000 supply-only for a compact galley under 4m. A standard L-shaped or single-wall kitchen (4–7m) runs $12,000–$20,000. An open-plan kitchen with island (7m+) starts at $18,000–$30,000+. A whole-home package covering kitchen, laundry, and wardrobes runs $30,000–$70,000+. These figures are supply only and exclude stone ($2,500–$12,000), appliances ($4,000–$25,000), plumbing, electrical, and structural works such as wall removal.
What are the main challenges of renovating a post-war kitchen in Nunawading?
Nunawading’s 1950s–1970s post-war homes present four specific renovation challenges. First, low ceiling heights of 2.4m in most original rooms — below the 2.55–2.7m of later suburban homes — require careful cabinet height planning to avoid an oppressive overhead feel. Second, internal brick walls between the original kitchen and living zone are frequently load-bearing and require structural engineer assessment and a building permit before removal. Third, original galley or small L-shape kitchen footprints that are too small for a contemporary family kitchen brief without wall removal or minor extension. Fourth, subfloor conditions in 1950s slab-on-ground homes that affect floor level continuity when extending through to a living zone.
How do I maximise ceiling height in a Nunawading kitchen renovation?
Three approaches work effectively in Nunawading’s 2.4m ceiling height rooms. First, run overhead cabinets floor-to-ceiling with no soffit gap — a gap between the top of the overhead cabinet and the ceiling at 2.4m looks more cramped than ceiling-height cabinetry. Second, use a shadow gap or recessed cornice detail rather than a thick cornice termination, which reduces the visual weight of the ceiling-height cabinet. Third, keep the overhead cabinet door profile simple — a flat-slab or Slim-Shaker profile reads less heavy than an ornate profile at low ceiling heights. These three decisions make a 2.4m kitchen feel taller than it is.
Does Nunawading require planning permits for kitchen renovation?
For internal joinery replacement in Nunawading — cabinets, benchtops, splashback — no planning permit is required. Nunawading falls under Whitehorse City Council, which has a light heritage overlay footprint in this suburb. If your project involves wall removal or structural changes, a building permit is required. A structural engineer’s assessment is required before a building permit for wall removal can be issued. Whitehorse City Council standard building permit processing times for residential structural works are typically 3–6 weeks in 2026.
Do you service Nunawading and surrounding Melbourne east suburbs?
Yes. Silk Touch Joinery is actively working across Melbourne’s east including Nunawading, Blackburn, Mitcham, Vermont, Forest Hill, Box Hill, and surrounding Whitehorse suburbs. Contact us to book a free in-home consultation at your Nunawading property.
Ready to Renovate Your Nunawading Kitchen?
A Nunawading kitchen renovation done right is one where every decision reflects the specific building and its specific constraints. The ceiling is 2.4m — that is fixed, and it changes the cabinet heights, the profile choice, the ceiling termination detail, the bench-to-overhead clearance, and the lighting specification. The wall between the kitchen and the living zone may be load-bearing — that must be assessed by a structural engineer before any works proceed, and the joinery design follows that confirmation, not the other way around. The original galley layout dates from a domestic era that no longer matches how the household lives — it needs to be updated, whether through an in-place renovation, a structural open-plan conversion, or a minor rear extension that resolves the ceiling height question permanently.
None of these constraints prevents a successful renovation. Each of them has a correct response. This guide has covered all of them — the ceiling height calculation and the three decisions that make a 2.4m kitchen feel taller than it is, the structural sequence for a safe open-plan conversion, the layout options across every footprint and budget, the material palettes that work and the ones that compress, and the honest 2026 pricing picture across every scope of work in Nunawading.
If you are planning a custom kitchen renovation in Nunawading Melbourne and want a Silk Touch Joinery team member to walk through the ceiling height question, the structural question, and the layout options at your specific property, book a free in-home consultation below. We will assess the ceiling, the walls, and the footprint — and tell you exactly what done right looks like for your home.