
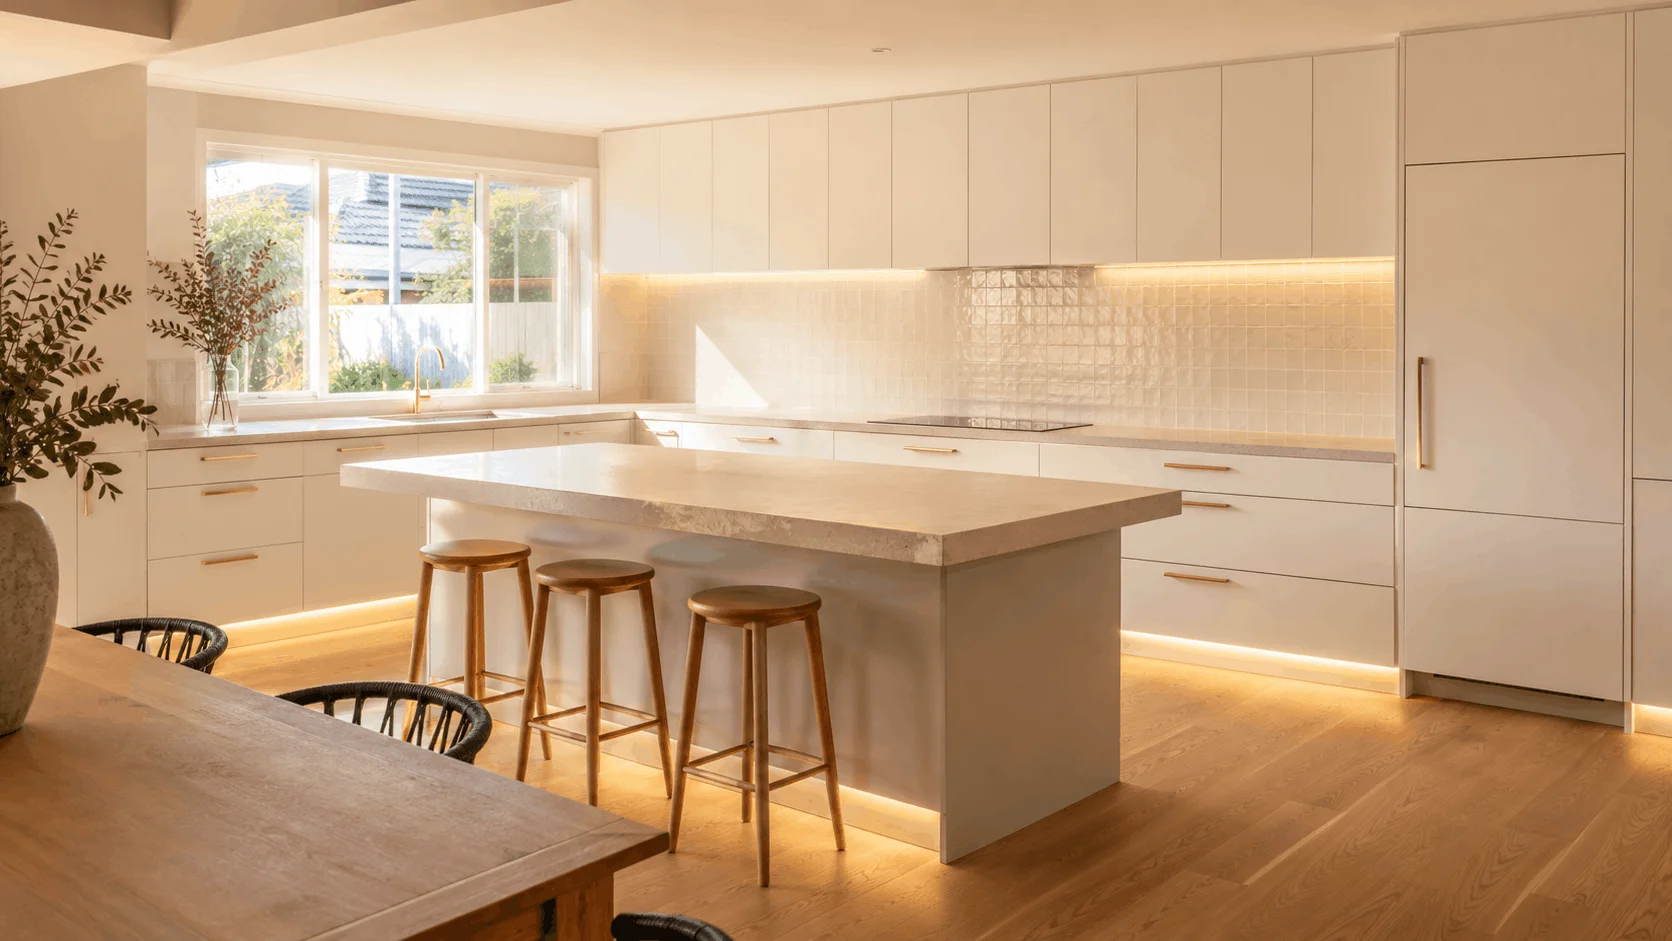
Nobody regrets the big calls in a kitchen renovation. You don’t lie awake six months later wondering whether you chose the right benchtop material or whether the island was worth it. The big decisions get agonised over properly. They get measured, quoted, and debated until they’re right.
The regrets are always the small ones — the decisions that felt minor during the design phase and turned out to matter every single day. The power point that’s 400mm too far to the left. The base cabinet that looked fine on the drawing and became a crouching exercise in real life. The bin that ended up on the kitchen floor because nobody thought to integrate it.
We hear these things constantly. Silk Touch Joinery works across Melbourne North, and after conversations with homeowners in the months after installation, the same seven items come up with enough regularity that this list almost writes itself. These aren’t hypothetical warnings. They’re observed patterns from real Coburg and Melbourne North kitchens — post-war workers’ cottages, California Bungalows, rear extensions, terrace conversions.
We’ve already covered kitchen renovation costs for Melbourne North and the layout-specific challenges of kitchen renovation in Northcote. This post is about the decisions inside the design — the ones that look fine on paper and feel wrong after six months of daily use.
1. Not Enough Power Points — And Putting Them in the Wrong Places
The regret
Three double GPOs in a 5m kitchen. One behind the kettle, one behind the toaster, one near the fridge. No power inside the pantry column. No power under the overhead cabinets. No USB outlets anywhere. The splashback is finished and the electrician is gone. The power board appears.
The consequence
A power board on the benchtop is not a minor aesthetic issue — it is a daily reminder that the electrical plan was not thought through. It occupies 300mm of the most valuable surface in the kitchen. Cords drape across the bench. The toaster, the kettle, and the phone are all competing for the same two outlets. In a Coburg post-war home where the kitchen bench is already modest in length, those 300mm are not recoverable.
The fix
- One double GPO every 900mm along the full splashback run — not just at each end
- One GPO inside the pantry column at mid-shelf height, where a charge pad or small appliance will sit
- One GPO under the overhead cabinet run, on a switched circuit for LED strip lighting
- One recessed or pop-up GPO on the island bench surface (Legrand or Clipsal pop-up units sit flush when not in use)
- USB-A and USB-C outlets integrated into two or three of the GPOs along the splashback run
In a standard 5m kitchen this typically means six to eight GPOs in total. Most homeowners who regret their power point placement have three or four.
The cost of getting it right
An additional GPO during the electrical rough-in phase costs $80–$150. A GPO added after the splashback is tiled and the cabinetry is installed costs $400–$800 minimum, often requires tile removal, and produces a visible patch. The power point decision is made during the rough-in — after that, it is expensive and disruptive to change.
Coburg-specific note: post-war homes often have older consumer mains boards with limited circuit capacity. If the renovation includes a new oven, rangehood, and dishwasher, a board upgrade may already be required. This is the moment to add the additional circuits at minimal incremental cost — they won’t be cheaper to add later.
2. Choosing Doors Over Drawers for Base Cabinets
The regret
A beautiful kitchen — until you open the base cabinets and find a chaotic pile of saucepan lids, mixing bowls, and baking trays that avalanche out every time you reach for something at the back.
The consequence
Doors on base cabinets require the homeowner to crouch, reach, and rummage. A pot stored at the back of a 600mm-deep base cabinet behind a door is functionally inaccessible without removing everything in front of it. Most homeowners with door-fronted base cabinets end up using only the front third of each cabinet. The back third becomes a graveyard of rarely-used items that nobody can name without opening the door.
This is not a preference issue — it’s a geometry issue. A 600mm-deep cabinet is too deep to access efficiently from the front without a drawer to bring the contents to you.
The fix
Replace door-fronted base cabinets with full-extension soft-close drawer configurations wherever possible. A 600mm-wide base cabinet with three drawers — Blum Legrabox or Tandembox Antaro are the industry standard — provides dramatically more accessible storage than the same cabinet with two doors.
The top drawer holds cutlery and utensils. The second drawer holds frequently-used pots and pans on their sides. The third deep drawer holds bulkier items. All three are fully visible and fully accessible without crouching, without reaching, without removing anything from in front.
The one exception: under the sink and dishwasher, where plumbing and appliance connections require door or pull-out drawer frame access. For all other base cabinetry, drawers outperform doors in every measurable functional way.
The cost difference
Drawers cost more than doors — roughly $180–$350 per drawer box versus $60–$120 per door panel. A full all-drawer base configuration costs approximately 18–25% more in custom kitchen cabinets than an equivalent door configuration. Over a 15-year kitchen lifespan, the drawer upgrade is consistently the highest value-per-dollar specification decision available.
3. No Integrated Pull-Out Bin System
The regret
A freestanding bin sitting on the kitchen floor. In a 900mm aisle between the island and the cabinet run, it reduces the working aisle to 600mm. Every person who enters the kitchen navigates around it. In a family kitchen with children, it is knocked over regularly.
The consequence
A freestanding bin on the floor is a permanent circulation obstacle, a visual distraction, and a hygiene surface that is difficult to clean beneath. In Coburg’s post-war homes where the kitchen commonly opens to a rear living area, the bin is also visible from the living room — and it is not the feature anyone wants visible.
The irony is that the integrated alternative is not complicated. It’s a standard product that has existed for decades, costs a fraction of the overall renovation budget, and is specified in almost every commercial kitchen in the country. It is one of the most consistently omitted items in residential kitchen briefs.
The fix
A pull-out bin system integrated into a 400mm or 500mm base cabinet — two compartments for waste and recycling, on a full-extension runner, flush behind a cabinet door. The industry standard hardware is Hailo or Vauth-Sagel. At 400mm wide, this cabinet fits into almost any kitchen layout without sacrificing meaningful storage.
The bin compartments pull fully out and are removable for emptying. The floor beneath the cabinet is accessible for cleaning. The aisle remains clear. The living room view is clear. The kitchen functions as it should.
The cost
$400–$900 for the hardware system during the joinery phase. $1,500–$3,500 or more to retrofit after installation — cabinet modification, new door, hardware, labour. The difference is not marginal. Include it in the original brief.
4. An Undersized or Poorly Positioned Island Bench
Two versions of this regret
Both are common in Coburg, and they pull in opposite directions. The first is an island that is too small — a 900mm × 600mm slab that is too narrow to prep on and too tight to seat more than one person. The second is an island positioned too close to the cabinet run, with an 800mm aisle that felt workable on the 2D floor plan and requires a sideways shuffle in real life.
The consequence of too-small
An island that cannot function as a prep surface defaults to a dumping ground. Bags, mail, school bags, and charging cables colonise it within a week of the renovation completing. The social function — seating for the family while one person cooks — is technically possible but uncomfortable at 600mm wide.
The consequence of wrong aisle width
The Australian standard for a kitchen aisle is 900mm minimum for a single cook, 1050mm for two cooks. An 850mm aisle feels tight during normal use. When the dishwasher door is open — typically 500–550mm of projection — the working aisle reduces to 300–350mm. That’s a genuine functional problem in a kitchen that’s used every day.
The fix
Island minimum dimensions for functional prep and seating: 1200mm long × 900mm wide. Preferred: 1500mm × 900mm. Aisle minimum on all working sides: 900mm. Preferred on the primary cook’s side: 1050mm.
These numbers should be non-negotiable in the design brief. Any layout that cannot achieve them should either drop the island or modify the overall kitchen footprint. The island is not the right compromise point.
The Coburg-specific opportunity
Post-war Coburg homes with rear extensions often have more kitchen floor area than their inner-terrace counterparts in Northcote or Brunswick. The island sizing regret is particularly acute here: homeowners with the space for a 1500mm island installed a 900mm one because the builder suggested keeping it manageable. The kitchen had the room. The brief didn’t capture it.
5. Skipping the Pantry Column
The regret
A kitchen with no dedicated pantry storage. Dry goods distributed across lower cabinets behind doors. Cans at the back. Cereal boxes balanced on top of each other. No clear sight lines to what’s in stock. Something is always being bought twice because it couldn’t be found.
The consequence
A kitchen without a pantry column is a kitchen where the cook cannot operate efficiently. The pantry function — a single, organised, fully visible repository for dry goods, small appliances, and non-perishables — ends up distributed chaotically across whatever space exists.
The time lost searching for items in a kitchen without a pantry column is measurable in minutes per day. Multiply that by seven days a week over a 15-year kitchen lifespan. The pantry column is not a luxury item.
The fix
A full-height pantry column — 600mm wide, 2100–2400mm tall, floor to ceiling — with internal adjustable shelving on full-extension pull-out frames. Le Mans carousel systems for deeper pantries. Fixed shelving for shallower 350mm-depth columns. The column positioned at the end of a cabinet run, either at the fridge end or adjacent to the cooking zone.
Internal LED strip lighting on a door-activated switch. One GPO at mid-height inside the column for a charge pad or small appliance. This is the one specification detail that consistently generates the most positive client feedback at the three-month follow-up.
The space argument
A 600mm pantry column occupies 0.6 linear metres of wall space and returns more daily functional value per linear metre than any other element in the kitchen. In Coburg homes where the kitchen footprint commonly allows for it, omitting the pantry column to reduce the joinery budget is the regret with the longest tail — it surfaces every single time someone can’t find the olive oil.
6. No Kickboard (Toe-Kick) Lighting
The regret
The renovation is complete. The kitchen looks exactly as intended during the day. At night, navigating to the kitchen for a glass of water requires turning on the full overhead lights — which illuminates the entire open-plan area and disturbs anyone sleeping. Or it means walking in darkness and hoping nothing has been left on the floor.
The consequence
Kickboard lighting is the most underspecified finishing detail in Australian kitchen renovations. It costs almost nothing relative to the overall joinery budget and changes the experience of the kitchen at night completely.
In Coburg homes where the kitchen opens directly to the living area, kickboard lighting also functions as architectural feature lighting — visible from the living room, it gives the kitchen depth and warmth after dark. It is the detail that makes a renovated kitchen look considered rather than merely completed.
The fix
LED strip lighting installed in the kickboard channel — the recessed gap between the base of the cabinet and the floor. Warm white, 2700K. Low-profile LED strip on a separate switched circuit, or a motion-sensor circuit for full convenience. The light level is sufficient to navigate safely without overhead glare.
The cost
$200–$500 for materials and wiring during the joinery installation phase, depending on the run length. Cost to retrofit after the cabinetry is installed: kickboard removal, strip installation, re-run wiring — $800–$1,800 minimum. This is one of the two items on this list (along with power points) that must be planned before the electrician’s rough-in to avoid significant retrofit cost.
7. Not Planning for the Scullery (Even a Small One)
The regret
This is the most aspirational regret on the list, and the one that takes the longest to surface. In the first year after the renovation, the kitchen looks perfect. By year three, the benchtop is perpetually occupied by the coffee machine, the toaster, the stand mixer, and the fruit bowl. By year five, the homeowner is fantasising about a scullery.
The consequence
A kitchen without a scullery — or at minimum an appliance garage — reaches its functional ceiling quickly in a household that cooks regularly. The main kitchen benchtop is the most contested surface in the home. Every small appliance that cannot be stored away competes for it permanently.
The frustrating part is that the smallest version of this fix — the appliance garage — is genuinely achievable in almost any kitchen at minimal cost, and it is almost never included in the brief because the homeowner doesn’t know to ask for it.
The fix — tiered by what’s achievable
Tier 1 — The Appliance Garage (any kitchen): A section of overhead cabinet with an internal power point and a roller or lift-up door that conceals the coffee machine, toaster, and kettle when not in use. Costs $800–$1,500 to include in the original joinery design. Returns 600–900mm of permanent benchtop space that would otherwise be permanently occupied.
Tier 2 — The Butler’s Pantry Alcove (kitchens with an adjacent alcove or corridor): A 1200–1800mm section of cabinetry and benchtop in a connected space — open to the main kitchen — that handles appliance storage, secondary prep, and consumable storage. Typical joinery cost: $8,000–$18,000 depending on scope.
Tier 3 — The Full Scullery (rear extension or large footprint homes): A fully enclosed secondary kitchen with a second sink, dishwasher, full appliance storage, and butler’s pantry function. Achievable in Coburg post-war homes with rear extension potential. Joinery cost: $15,000–$35,000. Total construction cost including builder’s works: $40,000–$90,000 and above.
The regret is almost never about the full scullery. It’s about the appliance garage. Homeowners who are shown this option during the design phase and decline it to save $1,200 consistently wish they hadn’t.
We’ve covered scullery and butler’s pantry decision-making in more depth in the context of how kitchen renovations Camberwell clients approach the same question — and the honest cost picture is in our kitchen cabinet costs Melbourne North guide.
How to Use This List Before You Sign a Quote
Every item on this list is easier and cheaper to include during the design and build phase than it is to add or retrofit afterwards. The renovation window is the only time these decisions are genuinely inexpensive. Once the electrician’s rough-in is done, the cabinetry is installed, and the splashback is tiled, the cost of change multiplies.
Use these seven items as a checklist to bring to your design consultation — not as demands, but as prompts that ensure your designer has considered each one.
Items 1 (power points) and 6 (kickboard lighting) are electrical decisions. They must be resolved before the electrician completes the rough-in. If you’re not certain these are in the electrical brief, ask explicitly.
Items 2 (drawers vs doors) and 5 (pantry column) are joinery decisions. They affect the cabinet schedule and need to be locked in before fabrication begins. These are not site decisions — they’re factory decisions.
Items 3 (bin system) and 7 (appliance garage or scullery) are brief decisions. They can be added to almost any design without requiring a redesign of the overall layout. The bin unit takes 400–500mm of base cabinet. The appliance garage takes one overhead cabinet section. Neither requires a new floor plan.
Item 4 (island sizing and aisle widths) is a spatial decision. It must be resolved before the floor plan is finalised. Once the island dimensions are set and the builder has submitted for permit or ordered materials, they cannot be easily changed. Get the aisle widths confirmed in writing before signing off.
Silk Touch Joinery offers an in-home consultation where we walk through all seven with you at your property — measuring your actual space, reviewing your brief against these items, and identifying anything that might surface as a regret later.
Frequently Asked Questions
What is the most common kitchen renovation regret in Melbourne?
The most consistently reported kitchen renovation regret among Melbourne homeowners is insufficient power point and USB outlet placement. Most homeowners plan power for appliances on the bench but forget to account for phone charging, small appliances stored in the pantry column, and under-cabinet lighting circuits. The fix is simple during construction and expensive after: plan outlets at every 900mm along the splashback zone, inside the pantry column, and under overhead cabinet runs during the build phase.
Should I include a pull-out bin in my kitchen renovation?
Yes — a pull-out bin system integrated into the cabinetry is one of the highest daily-use items in a kitchen and one of the most regretted omissions. A standard under-bench pull-out bin (Hailo or equivalent, two compartments for waste and recycling) should be included in every kitchen renovation. In Melbourne North terrace kitchens where benchtop space is limited, a freestanding bin on the floor is a constant circulation obstacle. The integrated alternative occupies no floor space and costs $400–$900 to include during the joinery phase — and thousands to retrofit.
How many power points do I need in a kitchen renovation?
As a starting point, plan for one double power point every 900mm along the full splashback run, plus one inside the pantry column, one under the overhead cabinet run for LED strip lighting, and one on the island bench (recessed or pop-up). In a standard 5m kitchen, this typically means six to eight GPOs. Most homeowners who regret their power point placement have three or four — and spend the next ten years with a power board on the bench.
Is an island bench worth it in a Coburg terrace kitchen?
An island is worth including if the kitchen has a minimum 900mm clear aisle on all three working sides — ideally 1050mm. In a Coburg post-war home with a rear extension opening to an open-plan living space, an island is typically achievable and dramatically improves the kitchen’s functionality. In a narrow Victorian terrace without a rear extension, an island is often not viable — the aisle widths are insufficient. The regret cuts both ways: homeowners who forced an undersized island into a space that couldn’t accommodate it regret the compromise just as much as those who didn’t include one when the space would have supported it.
Do you do kitchen renovations in Coburg and Melbourne North?
Yes. Silk Touch Joinery is actively taking on kitchen renovation projects across Melbourne North including Coburg, Coburg North, Brunswick, Northcote, Fitzroy North, Thornbury, Preston, and surrounding inner north suburbs. Contact us to book an in-home consultation.
Don’t Leave These to the Retrofit
The seven items in this post cost a fraction of the overall renovation budget to include during the design and build phase. Left out, they cost a multiple to fix — if they can be fixed at all without significant disruption.
The renovation window is the only time these decisions are cheap. Post-war Coburg homes regularly have the space to do all seven well. The only reason they get omitted is because no one asked about them during the design phase.
If you’re planning a custom kitchen renovation in Coburg or Melbourne North, book an in-home consultation. We’ll go through this checklist at your property, with your actual measurements, against your actual brief — before anything gets locked in.
Silk Touch Joinery | Custom kitchen and whole-home joinery across Melbourne North and Melbourne’s inner east.